RP from NW PhotoShop Tutorial - B&W with a Touch of Color
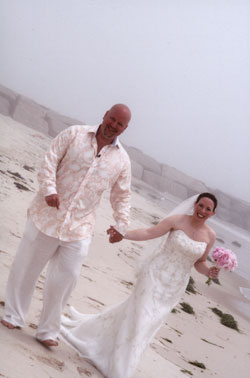
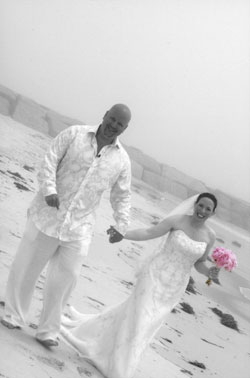
Well since many of you have your engagement or wedding pics and may be playing around with Photoshop...i figured i'd share how to do those B&W pics with a touch of color...since asked by a fellow bride...who did a freakin' phenominal job just following my written instructions (yeahh Peggie!)
Here ya go...
INSTRUCTIONS:
Open the image you want to work with & save 2 copies of it...one in RGB color (go under IMAGE...then MODE)
Take the second copy, open it and turn it into GREYSCALE..(again..go under go under IMAGE...then MODE and YES to disregard color)...then after it turns B&W...go under the color mode again & save it back as RGC...it will still be B& W but you can now drop it into your color verion of the pic)
Go into the B& W version and go to SELECT and choose ALL...then copy...and paste it onto the color version of your pic. So now you will have 2 layers in your file..the top layer will be your B&W version..the bottom your color one.
The theory is to “erase” the parts of the B&W version so that the color below can show thru. Now go to the bottom of your Layers window (if you don’t see the window go under WINDOW..then choose LAYERS and it will pop up)
Select the LAYER MASK tool...it looks like a grey horizontal rectangle with a white circle in it. After clicking it...select the BRUSH tool out of your tool box...(and make sure you have default colors of black & white selected in your tool box as well.) With Black selected for the brush color...click on the photo where you want to bring color up from the background...you will see it come thru. Continue using the brush to “paint away” the B&W and let the color come thru. And if you mess up...just select white in your tool box...then take the brush & paint over that area, and it will bring the B&W version back.
Here is the 'before & after'...happy PhotoShopping!
Here ya go...
INSTRUCTIONS:
Open the image you want to work with & save 2 copies of it...one in RGB color (go under IMAGE...then MODE)
Take the second copy, open it and turn it into GREYSCALE..(again..go under go under IMAGE...then MODE and YES to disregard color)...then after it turns B&W...go under the color mode again & save it back as RGC...it will still be B& W but you can now drop it into your color verion of the pic)
Go into the B& W version and go to SELECT and choose ALL...then copy...and paste it onto the color version of your pic. So now you will have 2 layers in your file..the top layer will be your B&W version..the bottom your color one.
The theory is to “erase” the parts of the B&W version so that the color below can show thru. Now go to the bottom of your Layers window (if you don’t see the window go under WINDOW..then choose LAYERS and it will pop up)
Select the LAYER MASK tool...it looks like a grey horizontal rectangle with a white circle in it. After clicking it...select the BRUSH tool out of your tool box...(and make sure you have default colors of black & white selected in your tool box as well.) With Black selected for the brush color...click on the photo where you want to bring color up from the background...you will see it come thru. Continue using the brush to “paint away” the B&W and let the color come thru. And if you mess up...just select white in your tool box...then take the brush & paint over that area, and it will bring the B&W version back.
Here is the 'before & after'...happy PhotoShopping!