
DIY Guestbook - Repost from '09
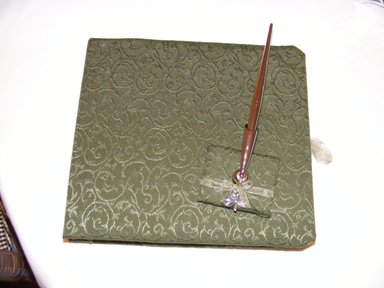
Supplies Needed:
8x8 scrapbook – any color (I prefer the post-bound kind)
Approximately 1 yard of fabric (to match your décor)
Heat-N-Bond (the no sew kind) – here is a link to what it looks like: http://www.joann.com/joann/catalog.jsp?CATID=cat483848&PRODID=prd2979&source=search
2 coordinating pieces of heavy cardstock (I prefer Bazzill)
Glue Gun
Iron & Ironing Board
Sharp Fabric Scissors
Instructions:
1) Take the scrapbook apart so that you have the front and back covers separate.
2) Trace a 1 inch circumference around the edges of the front and back covers onto the front of the Heat-N-Bond (the smooth side, not the part that is rough) ? this is so that you have an inch of extra material around the each cover
3) Iron the Heat-N-Bond onto the back side of the fabric following the directions on the Heat-N-Bond packaging. You iron it on the back side because this is the side that you will not want to be the cover of the book.
4) Cut out each piece with a sharp scissor on the lines that you traced in step 2.
5) Peel off the white part of the Heat-N-Bond.
6) Place the front cover onto the ironing board.
7) Place your fabric over the center of the front cover and iron the piece of fabric on the front cover including all of the edges. I start from the center out so that you don’t get any wrinkles or bubbles.
8) Flip the front cover so that the inside is showing. Now you should have an extra inch or so of fabric to iron onto the inside of the front cover. Iron each side from one end to the other to adhere the fabric to the back side of the front cover.
9) Repeat steps 6-8 for the back cover of the scrapbook.
10) Hot glue the card stock to the back sides of the front and back covers of the scrapbook.
11) Punch holes in whatever paper you want to use for the guest book if you are using it as a guest book.
12) Put the scrapbook back together and you have a completed project!
Note: I hot glued equal pieces of ribbon on the back side of the covers prior to putting the cardstock on the back side so that I could use them to tie the book closed.

