Post New Topic

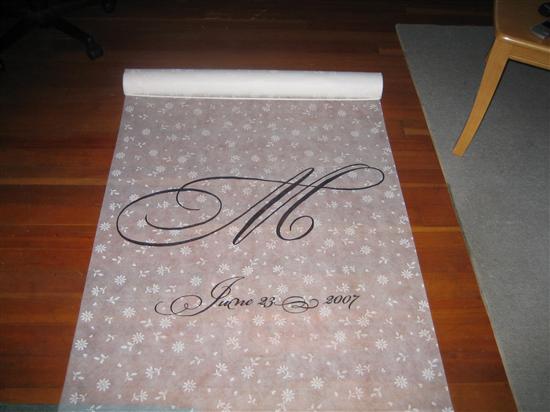
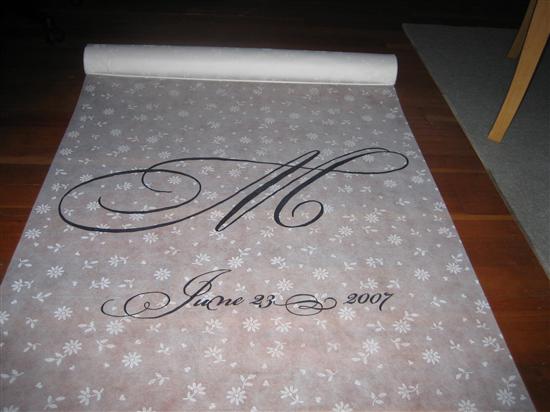
My DIY Aisle Runner

GabrielleandJohn Posted:

My DIY Aisle Runner

1 AC Moore Isle Runer: $15
1 thin black sharpie: $4
1 Regular blk sharpie: $4
1 free font download: $0
1 magnum blk sharpie: $5
Total cost $28

Not used: 1 magnum sharpie


2Be1 Posted:

Re: My DIY Aisle Runner

Great job . . . looks fabulous
snydl40 Posted:

Re: My DIY Aisle Runner

It came out beautiful.
Jennie0898 Posted:

Re: My DIY Aisle Runner

Wow, well done. It looks great!!

NowAndForever2012 Posted:

Re: My DIY Aisle Runner

great job

beachbum05 Posted:

Re: My DIY Aisle Runner

ooh! What font? And where did you download it from? It looks GREAT!!!

jlu830 Posted:

Re: My DIY Aisle Runner

looks good!

i really want to have a custom aisle runner but i'm not artistic at all!! so afraid i'll mess the whole thing up! Can you tell us what else you did to it? just traced in pencil then filled in with sharpie? thanks!
sassygirl9 Posted:

Re: My DIY Aisle Runner

love it

TheMrandMrsof2008 Posted:

Re: My DIY Aisle Runner

Where are the directions on how to do it? I need to know please...IT IS AMAZING!

ShanonandSteve Posted:

Re: My DIY Aisle Runner

very nice!!!

it came out great
Kaytea Posted:

Re: My DIY Aisle Runner

WOW! that is gorgeous!! I'm starting to shop for my aisle runner now
Hisforever Posted:

Re: My DIY Aisle Runner

that looks great!!!!!

Kimbalina Posted:

Re: My DIY Aisle Runner

ABSOLUTLEY AMAZING.. I cant wait to make one.
Can you give us directions?
GabrielleandJohn Posted:

Re: My DIY Aisle Runner

I will send you all a reply via FM but for all the ladies after now let me explain how I did it.

1. Copied the font from my invitations (see in my album: Bickham).
2. I printed out the 'M' in 800 font in MS publisher
3. In MS publisher 2007 I choose the 'Poster' option and then the 44x33 inch option allowing for only a 34 inch width (because that was the width of my aisle runer minus 2 inched)
4. Print the 'M' and the date on 9, 8x10 standard pieces of paper.
5. Taped said pieces to my dining room table
6. With FINE sharpie, outline the whole design.
7. Take sanity brake.
8. Remove the papers under aisle runner as they will confuse you.
9. Place paper under Aisle runner, make sure the paper is 2x thick (2 pieces of paper for each section, the reason is that the sharpie will blead through and onto your table)
10. Fill in the outline with the REGULAR sharpie

I know if it doesnt seem dark enough but stand back and take a pic of it, it's perfect! Also, most catering halls and churches have dark floors. If you need any help, I am more than happy to assist! Good luck ladies and if you need an in home workshop I am happy to host one.

Gabrielle

Reply to this topic

Log in to reply or quote a post.