Post New Topic

DIY--BUBBLES, LETTERS & PLACECARDS

Aristotelina Posted:

DIY--BUBBLES, LETTERS & PLACECARDS

I've been super busy lately doing some DIY's and I wanted to share what I've accomplished thus far!!!

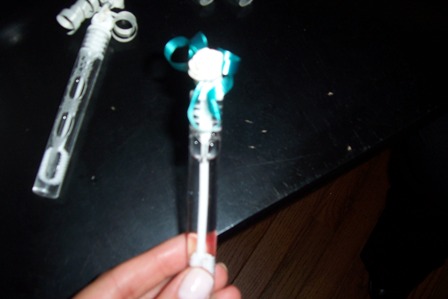
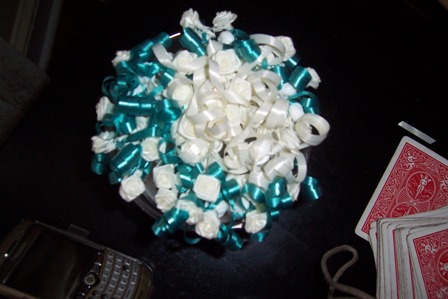
First, I ordered bubbles for the church and I added some teal and ivory ribbon with ivory flowers as decoration:
Aristotelina Posted:

Re: DIY--BUBBLES, LETTERS & PLACECARDS
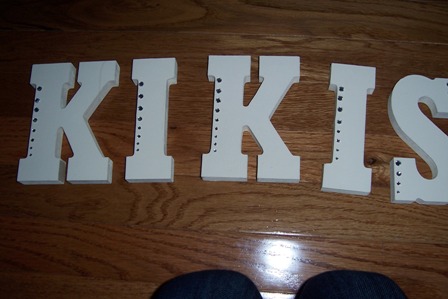
Then, instead of 'We Do' letters, I decided to use our last name to decorate the cake table or some other place. The truth was, I couldn't find all o f the letters for WE DO, but I thought this would work just as fine!!

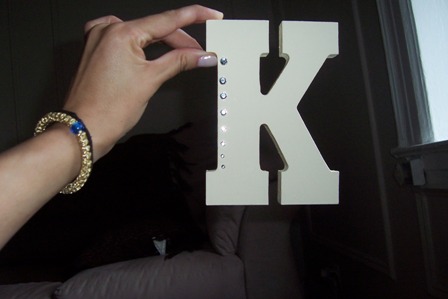
The letters were wood and I painted them with ivory paint and then added rhinestones to the sides of each letter. I also think I might varnish them to make them shiny.

Aristotelina Posted:

Re: DIY--BUBBLES, LETTERS & PLACECARDS
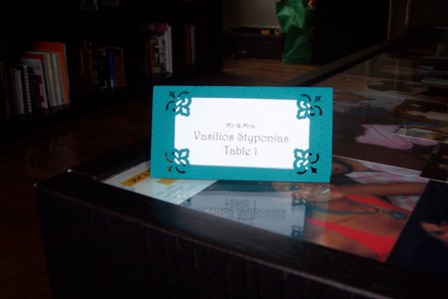
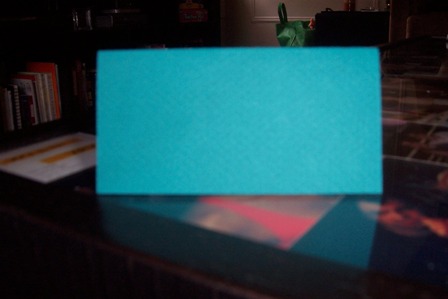
FINALLY (and this is what I'm MOST proud of!!) I started to try to make my own placecards. I took some of what was posted in the DIY forum by Kewlpuff and just changed it a WEE bit. Instead of adding on different pieces, I just folded the cardstock in half and punched in the holes and VOILA, a placecard!

Don't mind the white paper in the middle being crooked. It's regular computer paper and isn't really the right size.
Aristotelina Posted:

Re: DIY--BUBBLES, LETTERS & PLACECARDS
UGHHHHHH I POSTED IN THE WRONG FORUM!!!!!!!!!! SORRY GALS--MEANT TO PUT THIS IN THE DIY FORUM!!!

oldfriendoflive Posted:

Re: DIY--BUBBLES, LETTERS & PLACECARDS
Wow very nice. Love your place cards.

jennaandguy09 Posted:

Re: DIY--BUBBLES, LETTERS & PLACECARDS

Everything came out so great, love the colors and the bubbles are incredibly cute!!!!
shell1879 Posted:

Re: DIY--BUBBLES, LETTERS & PLACECARDS


Posted by Aristotelina

I've been super busy lately doing some DIY's and I wanted to share what I've accomplished thus far!!!

First, I ordered bubbles for the church and I added some teal and ivory ribbon with ivory flowers as decoration:


thats a good idea with the curling ribbon i was using regular ribbon and it was aggrivating me. it just slips off the tubes

thank you for the idea maybe i will switch to curling ribbons
FutureMrsWildes Posted:

Re: DIY--BUBBLES, LETTERS & PLACECARDS


Posted by Aristotelina

FINALLY (and this is what I'm MOST proud of!!) I started to try to make my own placecards. I took some of what was posted in the DIY forum by Kewlpuff and just changed it a WEE bit. Instead of adding on different pieces, I just folded the cardstock in half and punched in the holes and VOILA, a placecard!

Don't mind the white paper in the middle being crooked. It's regular computer paper and isn't really the right size.


Love the placecards - can you post how you did them??
gina409 Posted:

Re: DIY--BUBBLES, LETTERS & PLACECARDS

it all looks amazing!!!!!!

BarbieGrl10 Posted:

Re: DIY--BUBBLES, LETTERS & PLACECARDS

Loves it!!!!!! Great job!!!!!
Aristotelina Posted:

Re: DIY--BUBBLES, LETTERS & PLACECARDS


Posted by BarbieGrl10

Loves it!!!!!! Great job!!!!!


You TOTALLY inspired me to switch my colors to teal!!!!!! thank you!!!
Aristotelina Posted:

Re: DIY--BUBBLES, LETTERS & PLACECARDS

Here are the directions:

Okay, so you will need a corner hole punch (you can find it at Michaels Craft Store), card stock of your choice and a paper cutter (I bought mine for $10 from staples--it helps you cut straight lines and measure the paper as you cut) and lots of patience (until you get it right!!)

Okay, so I cut pieces of the cardstock.

1. Since the cardstock is 12 x 12, I just cut three 4-inch strips.

2. Then, I took each strip, held it horizontally and measured and cut them in 4 inch pieces. You should be left with a 4x4 square.

3. I then FOLDED this 4x4 square in half. I used a ruler to run it along the crease of the fold to make sure that the fold was totally flat and even.

4. I then took the corner hole punch and I REMOVED the protective clear plastic guard that it comes with. I did this because it helped me to make punches on any side/place of the card that I wished without having the guard in my way. ****PRECAUTION: you will have to practice using the punch in corners until you find the exact spot to punch in. Also, make sure to punch it hard and it should click TWICE in order for the design to fully come out.*****

5. I then unfolded the card and held it in my hand so that it was almost fully open. I took my hole punch, inserted a corner and punched the design in. I then did the same for each other corner. Like I said, this part took the most time until I figured out how to really use the puncher.

6. Once you finish punching the holes, your placecard is pretty much set!!!!! All you have to do is insert the seating information. You can type that stuff up on Microsoft Word in a table and just cut to size.

flairforfashion Posted:

Re: DIY--BUBBLES, LETTERS & PLACECARDS

Dude- you did a good job! Very nice!

ange1x Posted:

Re: DIY--BUBBLES, LETTERS & PLACECARDS

love your DIY!

FutureMrsWildes Posted:

Re: DIY--BUBBLES, LETTERS & PLACECARDS

Thanks for posting the directions!
aimerlena01 Posted:

Re: DIY--BUBBLES, LETTERS & PLACECARDS

Love everything!

PROBM Posted:

Re: DIY--BUBBLES, LETTERS & PLACECARDS

Aristotelina Posted:

Re: DIY--BUBBLES, LETTERS & PLACECARDS


Posted by flairforfashion

Dude- you did a good job! Very nice!


Thanks!!!!

And p.s.--I love using the word dude
jennarose023 Posted:

Re: DIY--BUBBLES, LETTERS & PLACECARDS

great job!!!!

Reply to this topic

Log in to reply or quote a post.