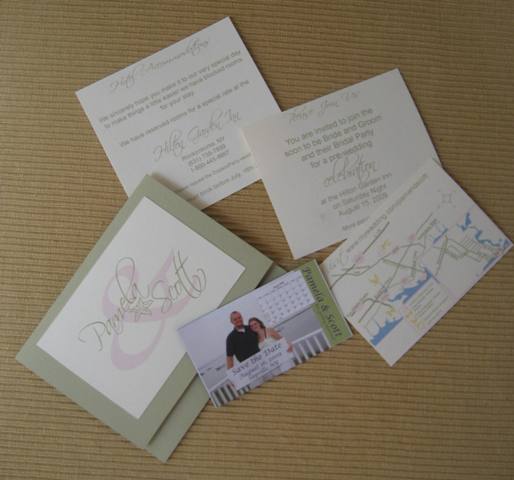
Wow, those are probably fancier than my formal invites will be!
Great job, I wish I had the time, patience, talent, and printer to do that myself!
MrsDtoBe09
Posted:
Member since
Re: my STD cards!
I love them! Great job!
sumerbride09
Posted:
Member since
Re: my STD cards!
thank you!!
CNC4eva3402
Posted:
Member since
Re: my STD cards!
Wow you did an amazing job..even the colors on the map match!! Amazing!!! hehe
sumerbride09
Posted:
Member since
Re: my STD cards!
Posted by CNC4eva3402
Wow you did an amazing job..even the colors on the map match!! Amazing!!! hehe
haha i designed and printed all the pieces myself in photoshop and i also designed the magnets and used vista print to print them. I used the same colors throughout and brought them to michaels to match up the paper color so they would all match. yes, im anal
BarbieGrl10
Posted:
Member since
Re: my STD cards!
WOW! They are beautiful! I love them!
MrsZtoBe
Posted:
Member since
Re: my STD cards!
Please give details on how you did this and where you got the materials! Beautiful!
ace730
Posted:
Member since
Re: my STD cards!
Those are amazing! Great job!
sumerbride09
Posted:
Member since
Re: my STD cards!
Posted by MrsZtoBe
Please give details on how you did this and where you got the materials! Beautiful!
i posted on the DIY board too..
here are my directions.. hopefully not too confusing!
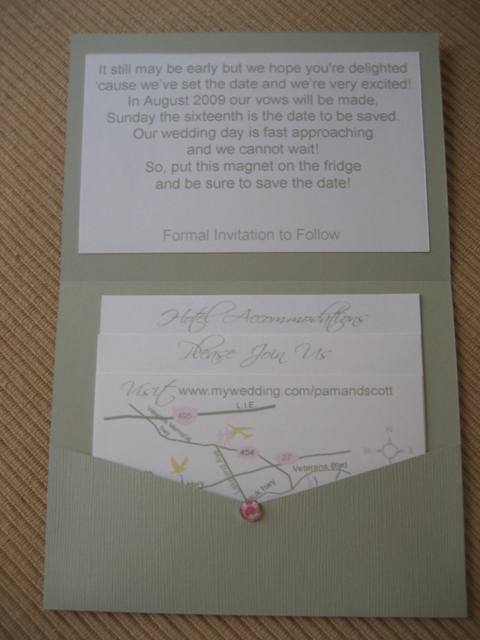
Materials: Pack of 250 sheets Ivory cardstock from Staples 40 sheets Bazzill Basics Paper from Michaels Gem stones from ACmoore Scrapbooking runner tape Removable glue dots Ruler and Exacto knife
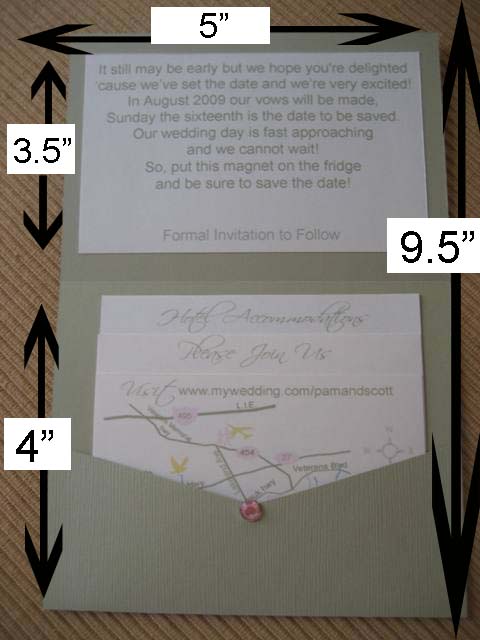
Directions: I made templates in photoshop with rulers to print and designed and printed the poems, monograms and inserts. Monogram= 4X2 ¾ make actual monogram small enough to fit under the magnet Poem=4 ½ X 2 ¾ Inserts vary with a ½ “ tab on the top in order for the card heading underneath to show I printed all the cards of the ivory card stock and cut them all to size
Cards: 12X12 paper cut into 2 strips 9 ½ X 5” (save scraps for future projects.. labels!) Score and fold at 2” up from bottom for bottom flap. Score and fold at 4” from last score (or 3 ½ “ from other end) Next, I cut the “v” shape on the bottom flap. Using a template and ruler I made a cut in the center ½ “ up and then from the top of the cut to both corners in order to make the “v” centered. Use the runner tape to adhere the sides bottom fold to make a pocket. Attach all the pieces and stuff the pockets, attach the stone and DONE!
Hope that helps! the hardest part was getting the measurements exactly right on the cards.. i know basic photoshop knowledge but in not a pro and i am 100% math challanged, so that was a challange.
oh and they fit perfectly into 4 3/4 X 5 3/4 invitation envelopes from staples!