Wedding Forums > Brides Helping Brides ™ > DIY Invites - new post to follow!!!
DIY Invites - new post to follow!!!
SwissMiss06
Posted: Aug 17, 2006 07:09 PM+

Posted: Aug 17, 2006 07:09 PM

DIY Invites - new post to follow!!!
Diy Invites...Instructions to follow:
These are the invites.
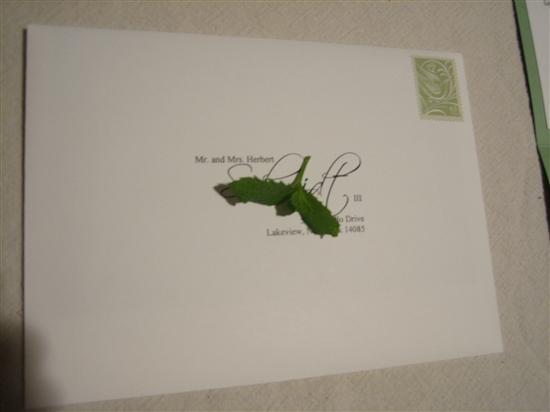 Outer envelopes
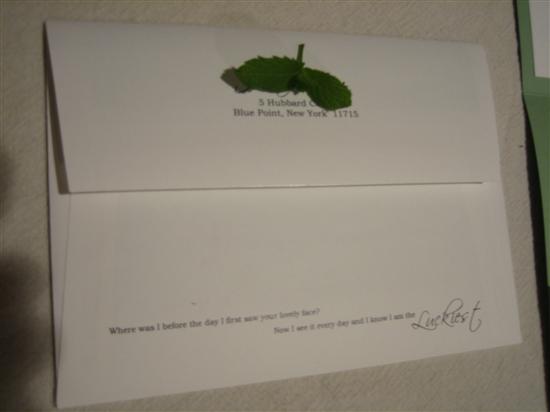 Back of outer envelopes
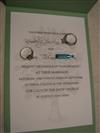 actual invite card
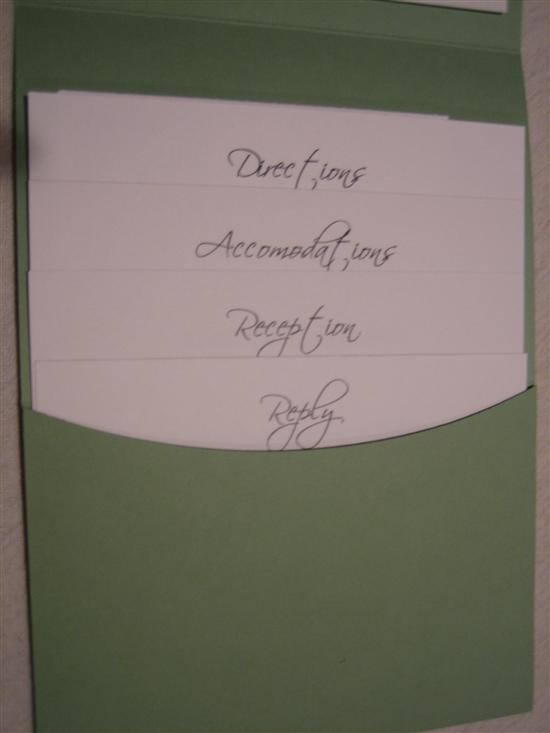 our inserts
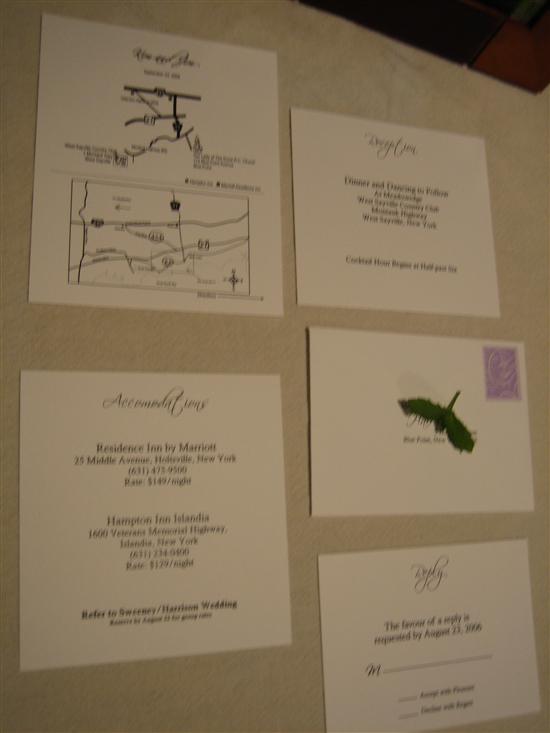 up close of our inserts
SwissMiss06
Posted: Aug 17, 2006 07:10 PM+
Posted: Aug 17, 2006 07:10 PM
Re: DIY Invites - new post to follow!!!
Here's how we did this:Here are some quick instructions on how to do them the way we did.
Thanks need to go to CJB88 and CaMacho for their inspiring DIY Invites! ?
Materials (and where to buy them)
Pocketfolds, inserts, and envelopes (cardsandpockets.com)
Ribbon (Michaels)
Blue glue pen (A.C Moore)
Spray adhesive (A.C. Moore)
Envelope liners (paper from Target)
Stamps (USPS – their ensemble matched our colors – PURE LUCK!)
Fiskars paper cutter (Costco for $30)
We had gone to Kate’s Paperie in the city to look at some wedding invite packages, but the ones we liked we were out of our budget. (No joke, the ones we wanted would have cost $2007!!! I thought the rep was talking about the year 2007, but FH informed me it was the COST).
We came home and looked online and figured out we could just re-produce them on our own but had to spend more time on them.
Cardsandpockets.com is a wonderful resource because they will send you a sample pack of their colors and a sample pack of certain invites. We received the sample packs and decided we could go with the “Gingko” green colorfold and simply use the white insert strips (they call them “printable insert strips”). FH calculated how many of each size we would need to have for the different inserts and we ordered 20% more than we needed for planned mistakes. We needed them!
We decided to go with the 5x7 rectangle ones instead of the square ones because any square envelope requires extra postage. I’m not sure that if we had gone with square it would have cost any more than the $0.63 it cost us to send the heavier 5x7 ones, but I was willing to cut any corner I needed.
We needed 150 invites, so we ordered 150 colorfolds (pocketfolds), 170 invitations to glue onto the pocketfold, and I think 120 printable insert strips that we would cut into the “inserts”. Cardsandpockets sells the reply envelopes and the outer envelopes as well as the response cards but we weren’t able to have their response cards fit into our pocketfold. We decided to use a section of the insert strip as the reply card. This actually saved us some $ as well.
We went to Michael’s to pick out the purple ribbon to put around the pocketfold and we originally thought we would wrap the ribbon around the pocketfold present-style, but after a few tries I decided I liked the simple bow at the top better and it used less ribbon.
For the actual invitation part, we used Microsoft Word after experimenting with Quark Xpress and MS Publisher – I didn’t even dare try Photoshop! We knew we wanted it in Scriptina (downloaded from dafont.com) and we knew we wanted a tree or some other natural symbol in the background. We found a clipart of the oak tree and imported it into MS word and then built our invite around that. I wish we had made our names in bold (to match the titles of the inserts within the pocket at the bottom) but we didn’t realize it was a problem until we’d printed them all….We used text boxes to get the words aligned exactly how we wanted it. FH printed the invites on his laser printer and then my MOH spent an entire Saturday night gluing the invites onto the pocketfolds. We used the blueglue pen from AC Moore first, but about halfway through we realized the glue wasn’t holding the papers together so we had to start over using spray adhesive. We should have sprayed everything together outside because we both felt high from the adhesive after about 10 minutes. You’ll need to put down some plastic if you’re doing it inside as well…My MOH’s apartment floor is still sticky after we did this!
For the inserts, we produced some templates using regular paper and decided how to align their titles with text boxes so they all lined up well when they were put in the pocket. This took quite awhile and was the most frustrating part. In hindsight I probably would have designed a template in MS word to allow us to print more than one to a page, then cut them. No, I felt eager and cut everything with the papercutter right away and then needed to configure the printer to pick up the smaller pieces of paper. NOT FUN, but if we can do it, I think anybody can do it.
We decided not to use the direction cards from the RH or the two hotels we’ve blocked rooms at because they weren’t that attractive and if we spent so much time planning these invites I didn’t want to put something ugly in them. Besides, I thought our guests would appreciate having one card with all the details on it. My sister (Matron-OH) is very good at MS Publisher and she produced a sketch of our beautiful map. I used symbols from NYS DOT to highlight the main routes our guests would be taking and because we didn’t have a color printer we just grayscaled the map and had it printed that way. I think it came out very well. We printed the map side first, made sure it was very dry then put them back through the printer to get the directions on the other side.
The reception, reply, and accommodations inserts were easy compared to the map insert. For the reply envelope, we printed them with our home address on the front and tucked them into the back of the pocket behind the map. We tried to fit it behind the actually “reply” card, but it looked funny.
For the outer envelope, I used a textbox with Scriptina font for the family name and used Times New Roman (I think) for the address. Our wedding song is the Luckiest, so FH wanted to incorporate it somehow into the invite. Writing it in a pretty way on the back of the envelope was a beautiful touch, in my opinion. We just made two textboxes, one with the Times New Roman font and then one with “Luckiest” written in Scriptina font. We played with the alignment until we got it right. We printed each of the envelopes with our mailing address and the Luckiest on the back, let them all dry, then went ahead with the front (guest) addresses.
I spent several evenings designing the addresses for each of our guests. We had to save each address for each family as a separate file and then print them all individually. Someone might know of a better way to do this, but we found this was the best way for us.
After they were addressed, we put the pre-cut envelope liners into the envelopes and glued them using the blueglue pens. We found the envelope liners as paper at Target and cut them down using a template that also was bought at Target. Then we trimmed them down even more with the papercutter so that they made the angle we were looking for. We got lucky that the paper matched our color scheme so well. I was voting against using the envelope liners, but I’m happy with the end result!
Then we put them all together and sent them out! FM me if you have any other questions. Everything (including postage) cost us about $350…..Big difference from $2k!!!
mnducc
Posted: Aug 18, 2006 11:18 AM+
Posted: Aug 18, 2006 11:18 AM
Re: DIY Invites - new post to follow!!!
WOW ...WOW....WOW!! Those are Great!!!
enjft
Posted: Aug 18, 2006 11:51 AM+
Posted: Aug 18, 2006 11:51 AM
Re: DIY Invites - new post to follow!!!
I love this! Can you please send me the template for the envelopes, Please!Thanks!
SwissMiss06
Posted: Aug 18, 2006 09:12 PM+
Posted: Aug 18, 2006 09:12 PM
Re: DIY Invites - new post to follow!!!
You have Forum Mail!
tropicalbride07
Posted: Aug 18, 2006 09:54 PM+
Posted: Aug 18, 2006 09:54 PM
Re: DIY Invites - new post to follow!!!
they came out great!!!!!!
Mandyin2007
Posted: Aug 19, 2006 01:44 PM+
Posted: Aug 19, 2006 01:44 PM
Re: DIY Invites - new post to follow!!!
They came out great!!
nala3378
Posted: Aug 20, 2006 10:35 AM+
Posted: Aug 20, 2006 10:35 AM
Re: DIY Invites - new post to follow!!!
those are very nice..You did a good job
melandchris07
Posted: Aug 27, 2006 05:25 PM+
Posted: Aug 27, 2006 05:25 PM
Re: DIY Invites - new post to follow!!!
I love your invites they are amazing you and your FH did a wonderful job!!! I actually just finished printing out my diy invites (the same pocketfold ones) I haven't glued them into the pocketfold yet so thank you for the tips!! I wanted to let anyone else know that as far as the envelopes I loaded all of my addresses into print shop and then did a mail merge. I had to put each envelope in one at a time because I was way too scared they would mess up but it was a lot easier having them already loaded on print shop and just doing the mail merge. Hope this helps!!!!If anyone has any questions let me know.
cherilicious16
Posted: Aug 27, 2006 11:23 PM+
Posted: Aug 27, 2006 11:23 PM
Re: DIY Invites - new post to follow!!!
THEY LOOK FANTASTIC!!!! good for you!
Mooshyboo
Posted: Aug 28, 2006 09:38 AM+
Posted: Aug 28, 2006 09:38 AM
Re: DIY Invites - new post to follow!!!
AMAZING job...
LT708
Posted: Aug 28, 2006 11:06 PM+
Posted: Aug 28, 2006 11:06 PM
Re: DIY Invites - new post to follow!!!
WoW! They came out great!
Fiance26
Posted: Aug 29, 2006 07:28 AM+
Posted: Aug 29, 2006 07:28 AM
Re: DIY Invites - new post to follow!!!
Great invites. I may do my own as well.
Gin-Char 104
Posted: Aug 30, 2006 12:23 PM+
Posted: Aug 30, 2006 12:23 PM
Re: DIY Invites - new post to follow!!!
wow thanks so much!
KD1279
Posted: Sep 12, 2006 01:42 PM+
Posted: Sep 12, 2006 01:42 PM
Re: DIY Invites - new post to follow!!!
These are so great!!!


Welcome New Vendors
- The Barn At Old Bethpage Discover the charm a...

- Tellers: An American Chophouse Celebrate Your Love ...

- Cup Of Tea Creative Unique Wedding Gifts...

- Speeches for Milestones The Big Day Has Arri...

- Long Island Bridal Expo Connecting Brides & ...

- 1 More Rep 1 More Rep: Elite Fi...

- Bellport Inn The Bellport Inn –...

- Fiddlers Dream Music Experience the Music...

- Havana Central Celebrate Your Weddi...

- Primerica Nelida Flynn Primerica Nelida Fly...

- Acetra Affairs Here at Acetra Affai...

- The Crushed Olive Discover Culinary Ex...
